Gluten-Free Fudgy Chocolate Brownies
BY Brimly.February 1, 2026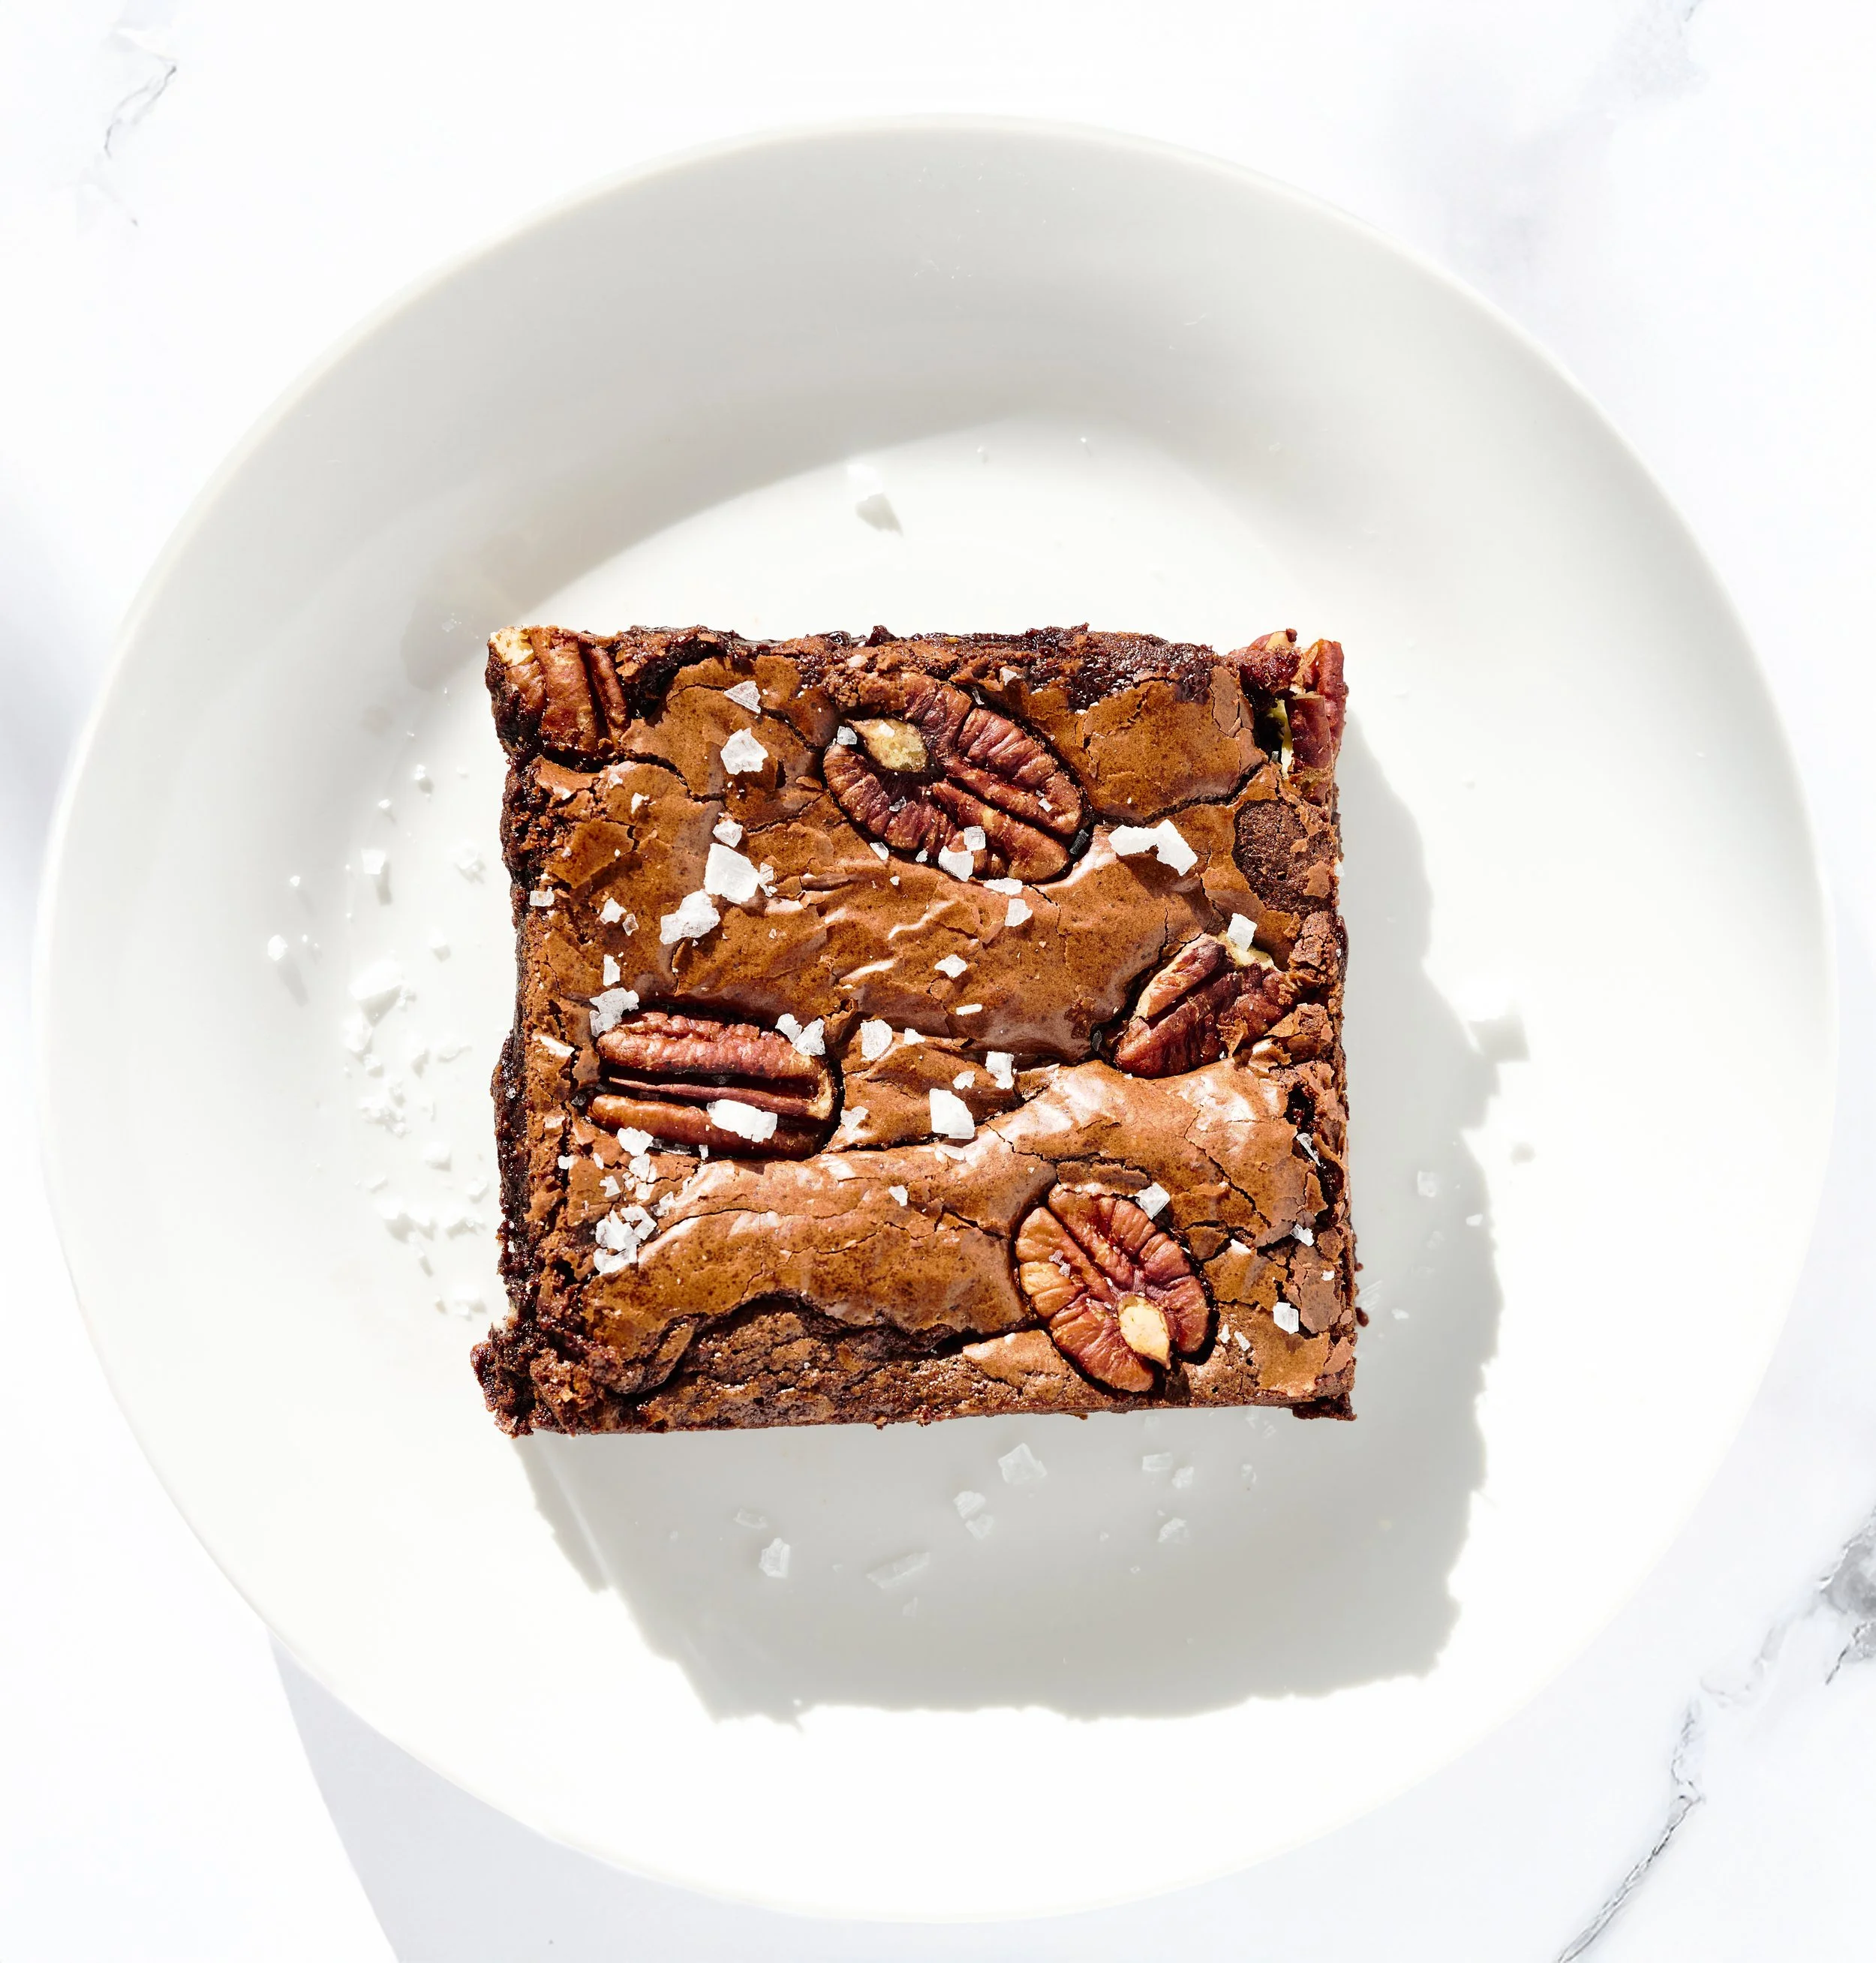
Photo By Editors @ the Brimly Test Kitchen


Mid TaskPREP: 30 minGluten-freesweet Treat Inspired by a brownie recipe from Von Vreeland on NYT Cooking, adapted for gluten-free, gum-free baking.
Now, Why This Recipe and What Makes It Special?
This recipe started as curiosity and turned into something I honestly didn’t expect. When I first came across the original brownie recipe, I was immediately drawn to how decadent it looked, the cracked surface, the richness, the way it felt like a real brownie and not something trying too hard. But as someone who can’t have gluten, gums, or soy, I wasn’t sure if translating that experience into a gluten-free version was even possible. I tried it once with a different flour and while it wasn’t a failure, it also wasn’t something I felt proud of. It didn’t have that “oh wow” moment.
Everything changed when I came back to it using King Arthur’s gluten-free flour with no xanthan gum. That choice alone transformed the recipe. Suddenly the structure made sense, the batter behaved predictably, and the final bake felt intentional rather than fragile. What makes this recipe special is how reliable it is. Once I realized it worked, I couldn’t stop making it. I made it again and again, half expecting it to fail, but it never did. You can genuinely make this recipe with your eyes closed, and as long as you stick to the ingredients and baking times, you’ll get the same result every time.
This brownie is deeply chocolatey and truly decadent. It’s not cakey, not overly sticky, not aggressively fudgy, it sits right in that perfect in-between where each bite feels rich but balanced. Honestly, it’s one of the best brownies I’ve ever had, including the ones I ate before going gluten-free. The fact that this version is gluten-free, gum-free, and soy-free still surprises me. It doesn’t feel like a compromise at all. It feels like a win, and that’s exactly why it finally felt right to share.
Lessons Learned
This recipe reinforced something I’ve learned over and over again in gluten-free baking: the right flour matters more than anything else. My first attempt taught me that even small changes in flour choice can completely alter the outcome. Using a flour I trust made the entire process smoother, from mixing to baking to slicing. Another big lesson was just how forgiving this recipe is. Once the method is followed, it consistently delivers, which is not something you can say about every gluten-free bake.
I also learned how much character comes from small steps. Tapping the pan midway through baking might seem unnecessary, but it genuinely enhances the surface of the brownies, giving them that crackled, bakery-style look. Skipping it won’t ruin the recipe, but including it adds personality. Cooling time was another important lesson, these brownies need time to set. Cutting too early doesn’t do them justice, and waiting even 30–45 minutes makes all the difference.
Portioning is another thing I learned quickly. These brownies are rich, really rich. Smaller squares are the way to go, especially if you want to savor them rather than overwhelm yourself. Lastly, this recipe reminded me that repetition builds confidence. Baking it over and over allowed me to trust it fully, and that trust is what makes sharing it feel good instead of rushed.
How to Make It Your Own
This recipe is flexible without losing its identity. You can mix the pecans directly into the batter instead of topping them, or skip nuts altogether if you prefer a smoother bite. Chocolate choices can also be adjusted, leaning more into milk chocolate for sweetness or slightly darker chocolate for depth. The white chocolate adds balance and softness, but it can be reduced if you prefer a less sweet profile.
You can also play with presentation. Cutting these into smaller squares makes them perfect for sharing, gifting, or serving alongside coffee. This is one of those recipes that holds up beautifully without needing extra toppings or embellishments.
Pro Tip:
Don’t skip tapping the pan between bake times, it adds beautiful cracks and character to the surface. Let the brownies cool fully before slicing for clean edges. Smaller slices go a long way with this recipe.
Summary Notes:
This is a rich, decadent brownie that delivers every single time. It’s easy to make, quick to assemble, and incredibly reliable once you follow the method. The texture lands right between fudgy and structured, without being cakey or sticky. It’s deeply chocolate-forward and satisfying in small portions.
Most importantly, this recipe proves that gluten-free, gum-free, and soy-free baking can still produce something truly special. It’s the kind of dessert you want to share, especially around Valentine’s Day, when chocolate feels like the right answer to everything. This one is worth the wait, worth the testing, and worth making again and again.
Tried it? Let us know how it went in the comments below.
At Brimly, we take pride in presenting you with the finest products that our editors independently handpicked. In the spirit of transparency, we want you to know that we may earn an affiliate commission when you purchase something through the retail links below.
Essentials you’ll need:


view:
LISTENIngredients
½ cup gluten-free all-purpose flour (no xanthan gum) [BUY]
½ cup dutch-processed cocoa powder [BUY]
½ cup (3 oz) milk chocolate bar, chopped [BUY]
½ cup (3 oz) white chocolate bar, chopped [BUY]
¾ cup granulated sugar
½ cup dark brown sugar, packed
1¼ tsp salt
1 tsp vanilla extract
2 extra-large eggs
½ cup unsalted butter, melted
¾ cup milk chocolate chips, melted [BUY]
¼ cup toasted pecans, whole [BUY]
flaky sea salt, for topping
Recipe Steps
Step 1
Preheat your oven to 350°F. Line an 8×8-inch or 9×9-inch baking pan with parchment paper, leaving an overhang on two sides, or butter the pan generously.
Step 2
In a large bowl, add the granulated sugar, brown sugar, eggs, vanilla extract, and salt. Using a hand mixer on medium speed, mix for 2 minutes, until smooth, glossy, and light brown.
Step 3
In a separate bowl, combine the melted butter and melted milk chocolate chips. Stir with a spatula until fully emulsified and smooth.
Step 4
With the hand mixer on low speed, slowly stream the melted chocolate mixture into the sugar mixture. Mix until fully combined.
Step 5
Add the gluten-free flour and cocoa powder. Mix again until fully incorporated and no dry pockets remain.
Step 6
Add the chopped milk chocolate and chopped white chocolate. Switch to a spatula and fold gently until evenly distributed.
Step 7
Transfer the batter to the prepared pan and spread evenly using a spatula. The batter will be thick.
Step 8
Press the toasted pecans gently into the surface of the batter.
Step 9
Bake for 15 minutes. Remove the pan from the oven and carefully tap it on a heat-safe surface a few times to encourage cracking.
Step 10
Sprinkle lightly with flaky sea salt. Return the pan to the oven and bake for an additional 12–15 minutes, until set with a glossy, crackled top.
Step 11
Remove from the oven and let cool completely in the pan for at least 1 hour before slicing.
Storage:
Store brownies in an airtight container at room temperature for up to 2 days.
For longer storage, refrigerate for up to 5–7 days.
More From Brimly.

by Brimly kitchen
by Brimly kitchen
by Brimly kitchen
by Brimly kitchen