BY Brimly.April 25, 2025Gluten-Free Snacking Crepe Strips
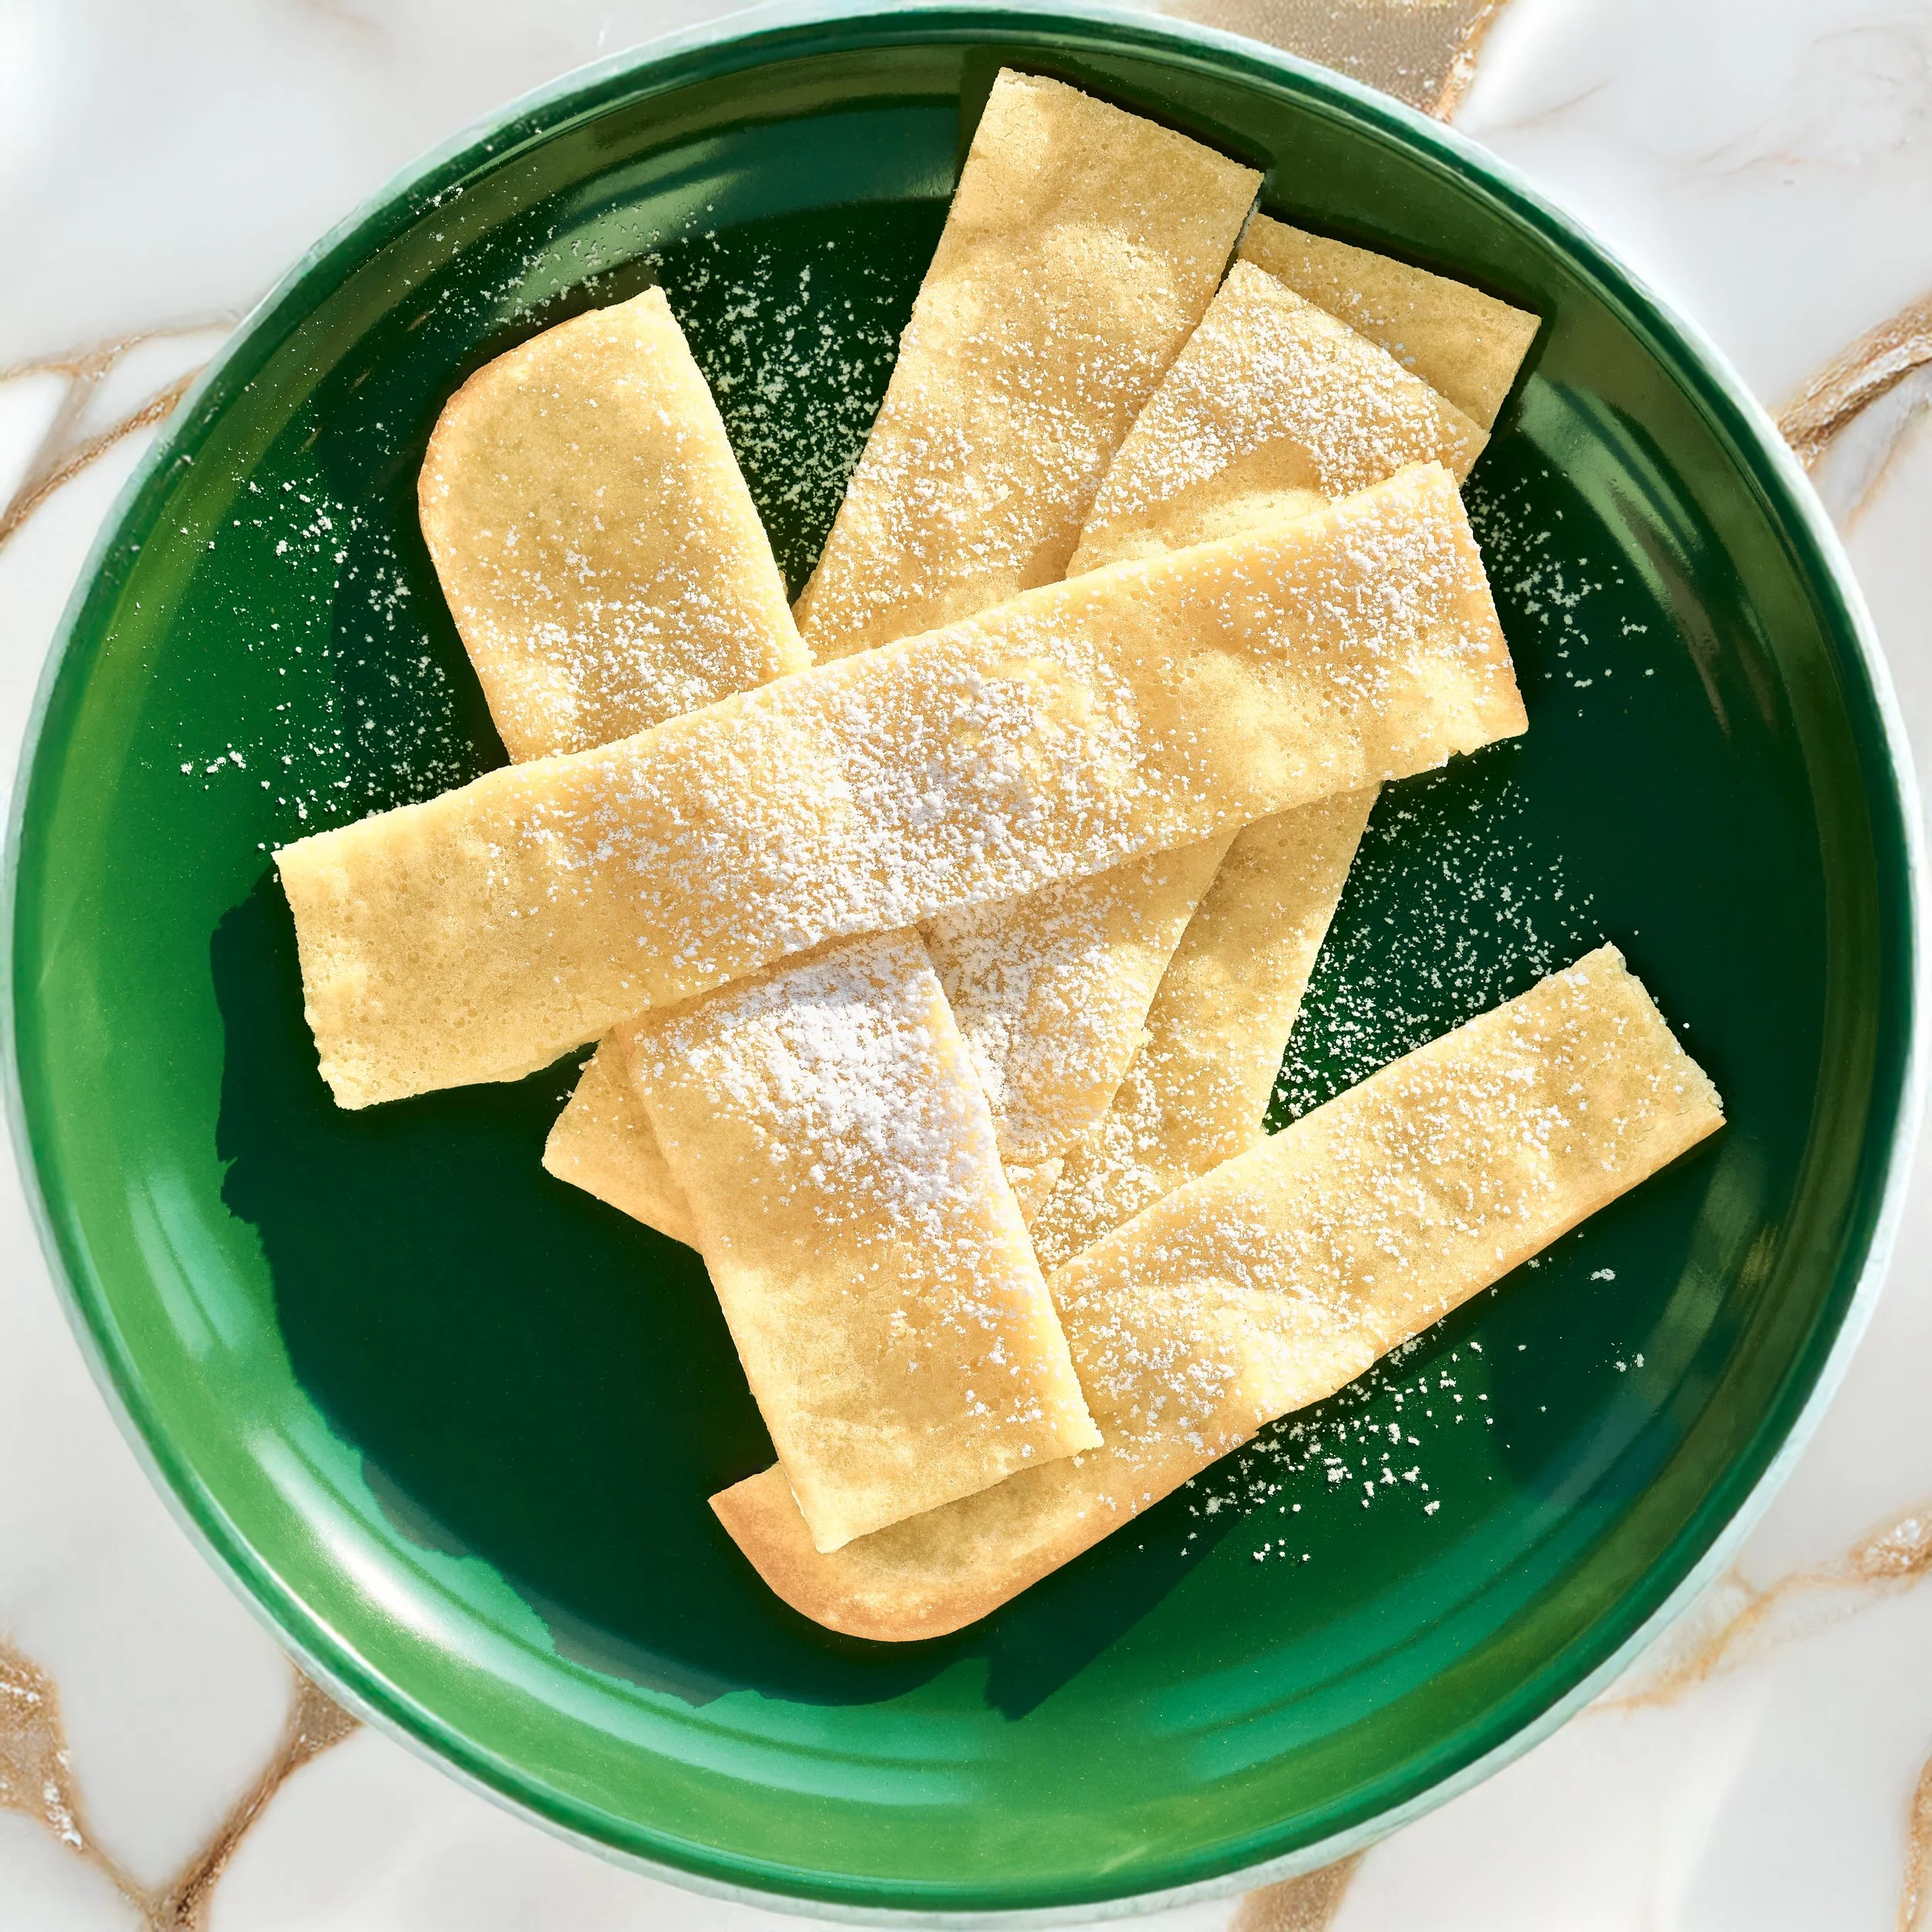
Photo By Editors @ the Brimly Test Kitchen


Novice Cook35 minutesGluten-freeSweet Treat Now, Why This Recipe and What Makes It Special?
So, why is this recipe special? This is our Gluten-Free Snacking Crepe Strips. This recipe is special because it is so simple. You can whip these up in just a few minutes and have snacks ready for everyone. It’s highly customizable—the simplest base batter you can make—and you can easily add different toppings or mix-ins to change up the flavor and appearance of this easy snack.
We came up with this recipe while trying to make regular crepes. However, we wanted to go for something that tasted a little more natural to what we personally enjoy. We weren’t necessarily aiming for traditional crepes—we wanted something with more pizazz. We actually started off frying them in a pan, but they stuck a little too much. Honestly, it was the pan, because we’ve made this recipe several times before, and when fried properly, it’s delicious—especially if you make them savory. They're always so tasty.
Eventually, we decided to convert the recipe into an oven method. We poured the batter into a well-oiled baking sheet, baked it at 400°F, and nailed it on the first try. This recipe has been a household favorite ever since. It does a great job satisfying a sweet tooth, but it’s versatile enough to go savory too.
You can easily tweak the sugar for a sweeter crepe, or cut back the sugar and make it savory with a little salt instead. We personally love making them spicy—we slice up onions and peppers, mix them into the batter, and either fry or bake them. They come out like a cross between crepe strips and savory jerky, or even a bit like fruit roll-ups if you go the sweet route.
If you want crunchier crepe strips, simply add a little more water to the batter and spread it thinner in the baking sheet. You'll get something almost like crackers. The beauty of this recipe is how open-ended it is. You can slice them into strips, squares, triangles—whatever you want.
They’re gluten-free, soy-free, and gum-free, so they’re great if you have any of those intolerances. They’re also kid-friendly, fun to make, and you can roll them, shape them, and snack on them however you like.
If you pull them a little early from the oven, they stay flexible. If you leave them in longer, they develop crispy edges, which we love. They’re satisfying, delicious, and worth trying—you’ll be hooked once you do.
Ingredient Call-Outs and Swaps
Alright, here are the ingredient call-outs, swaps, and all the lessons I picked up along the way.
Swaps & Suggestions
Almond Flour: Swap the rice-based gluten-free flour for almond flour if you want a nuttier flavor. It’ll change the taste completely—in a good way.
Oat Flour: For a breakfast vibe, oat flour works wonderfully. It’ll also give you a slightly more structured, flexible outcome.
Brown Sugar: Instead of white sugar, use brown sugar for a deeper, caramelized flavor.
Coconut Oil: Swap out the butter for coconut oil to lighten up the flavor and make it more tropical.
Milk Instead of Water: If you want a richer, creamier crepe, replace the water with milk.
Toppings: You can sprinkle cinnamon sugar instead of powdered sugar for a warm, cozy flavor. Or drizzle melted chocolate for a fun dessert twist.
Lessons Learned
Oil Your Pan Well: Even if you're using nonstick, don’t skimp on oil. A well-oiled pan helps the crepe cook evenly and release properly without tearing.
Use a Brush: Use a pastry brush to evenly coat the pan with oil before pouring the batter.
Let Them Cool Before Lifting: Wait for the crepe to cool a bit before trying to lift it off the pan. It releases much easier and reduces the chance of cracking.
Use the Right Tool: A precision turner (like a fish spatula) works wonders for lifting delicate crepes out of the pan.
Expect Imperfections: It’s okay if there are cracks when lifting or slicing the strips. These aren’t supposed to be perfectly uniform—they’re homemade snacks!
Scrape the Bowl: When mixing, always run a spatula around the bottom of your bowl to catch any unmixed flour pockets. If you see lumps in the batter after pouring, flatten them with a spatula in the pan.
Use an Electronic Whisk: An electric hand whisk makes the batter smoother, faster. But even if you’re whisking manually, just make sure to mix thoroughly and scrape well.
This is a very forgiving recipe—so have fun with it!
How to Make It Your Own
There are so many ways to put your own spin on these snacking crepe strips:
Flavor Boosts: Add a splash of vanilla, almond, lemon, or orange extract to the batter. If you’re using almond flour, almond extract would especially shine.
Texture Tweaks:
Thinner and crispier: Add a tablespoon or two of extra water.
Chewier: Add an extra tablespoon of flour for a slightly thicker batter.
Add-Ins:
Mini chocolate chips (because full-size might be too big for these thin crepes).
Finely chopped nuts for a little bite.
Savory Versions:
Skip the sugar.
Add a pinch of salt.
Dice onions, peppers, or even herbs into the batter.
Cheesy Option:
Sprinkle grated Parmesan over the top before baking for a savory, crispy snack.
Dessert Drizzle:
Melt chocolate and drizzle it over the baked crepe strips.
Dust with cinnamon sugar or coat with chocolate shell for a decadent finish.
Pro Tip:
If you want your crepe strips to be extra crispy and snackable, spread the batter as thinly as possible and rotate the pan halfway through baking. A thin, even layer bakes faster, crisps up beautifully, and gives you that light, crackly texture that's perfect for dipping, topping, or just snacking straight off the tray (oh, we definitely did—no shame here!).
Summary Notes:
If you try these Gluten-Free Snacking Crepe Strips, we’d love to hear about it! Drop your comments below and let us know what flavor combinations you created. This recipe is a base for endless creativity—so have fun with it, make it your own, and enjoy every bite!
At Brimly, we take pride in presenting you with the finest products that our editors independently handpicked. In the spirit of transparency, we want you to know that we may earn an affiliate commission when you purchase something through the retail links below.
Essentials you’ll need:


view:
LISTENIngredients
1½ cups gluten-free flour [BUY]
1 cup water
1 large egg
3 Tbsp salted butter, melted
3 Tbsp granulated sugar
1 Tbsp powdered sugar, for dusting
1 Tbsp vegetable oil
Recipe Steps
Step 1
Preheat your oven to 400°F (204°C). Generously oil a large baking sheet with the vegetable oil and set aside.
Step 2
In a large bowl, combine the gluten-free flour, sugar, butter, and egg. Mix until almost fully combined.
Step 3
Slowly stream in the water, whisking constantly until a very smooth and runny batter forms.
Step 4
Pour the batter onto the prepared baking sheet, spreading it out evenly.
Step 5
Bake on the top rack for about 20 minutes, or until the top is set and crispy.
Step 6
Let cool slightly, then slice into strips. Dust with powdered sugar and enjoy.
Note:
Keep in an airtight container at room temperature for up to 3 days or in the fridge for up to 1 week.
More From Brimly.

by Brimly kitchen
by Brimly kitchen
by Brimly kitchen
by Brimly kitchen
$10.95 AT AMAZON